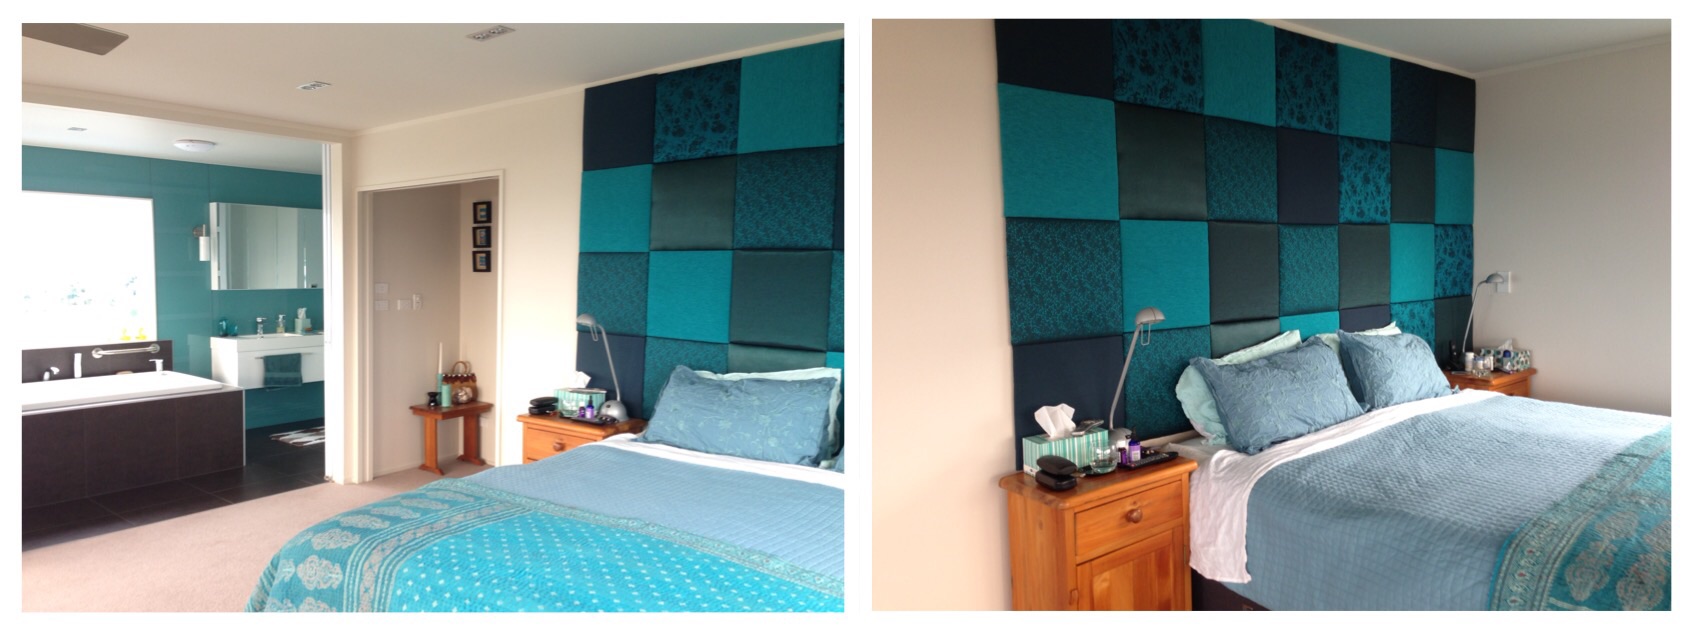
After much procrastination and exploring different options for affixing the panels to the wall , finally the bedhead is up.
I had been inspired by a couple of images on Pinterest:
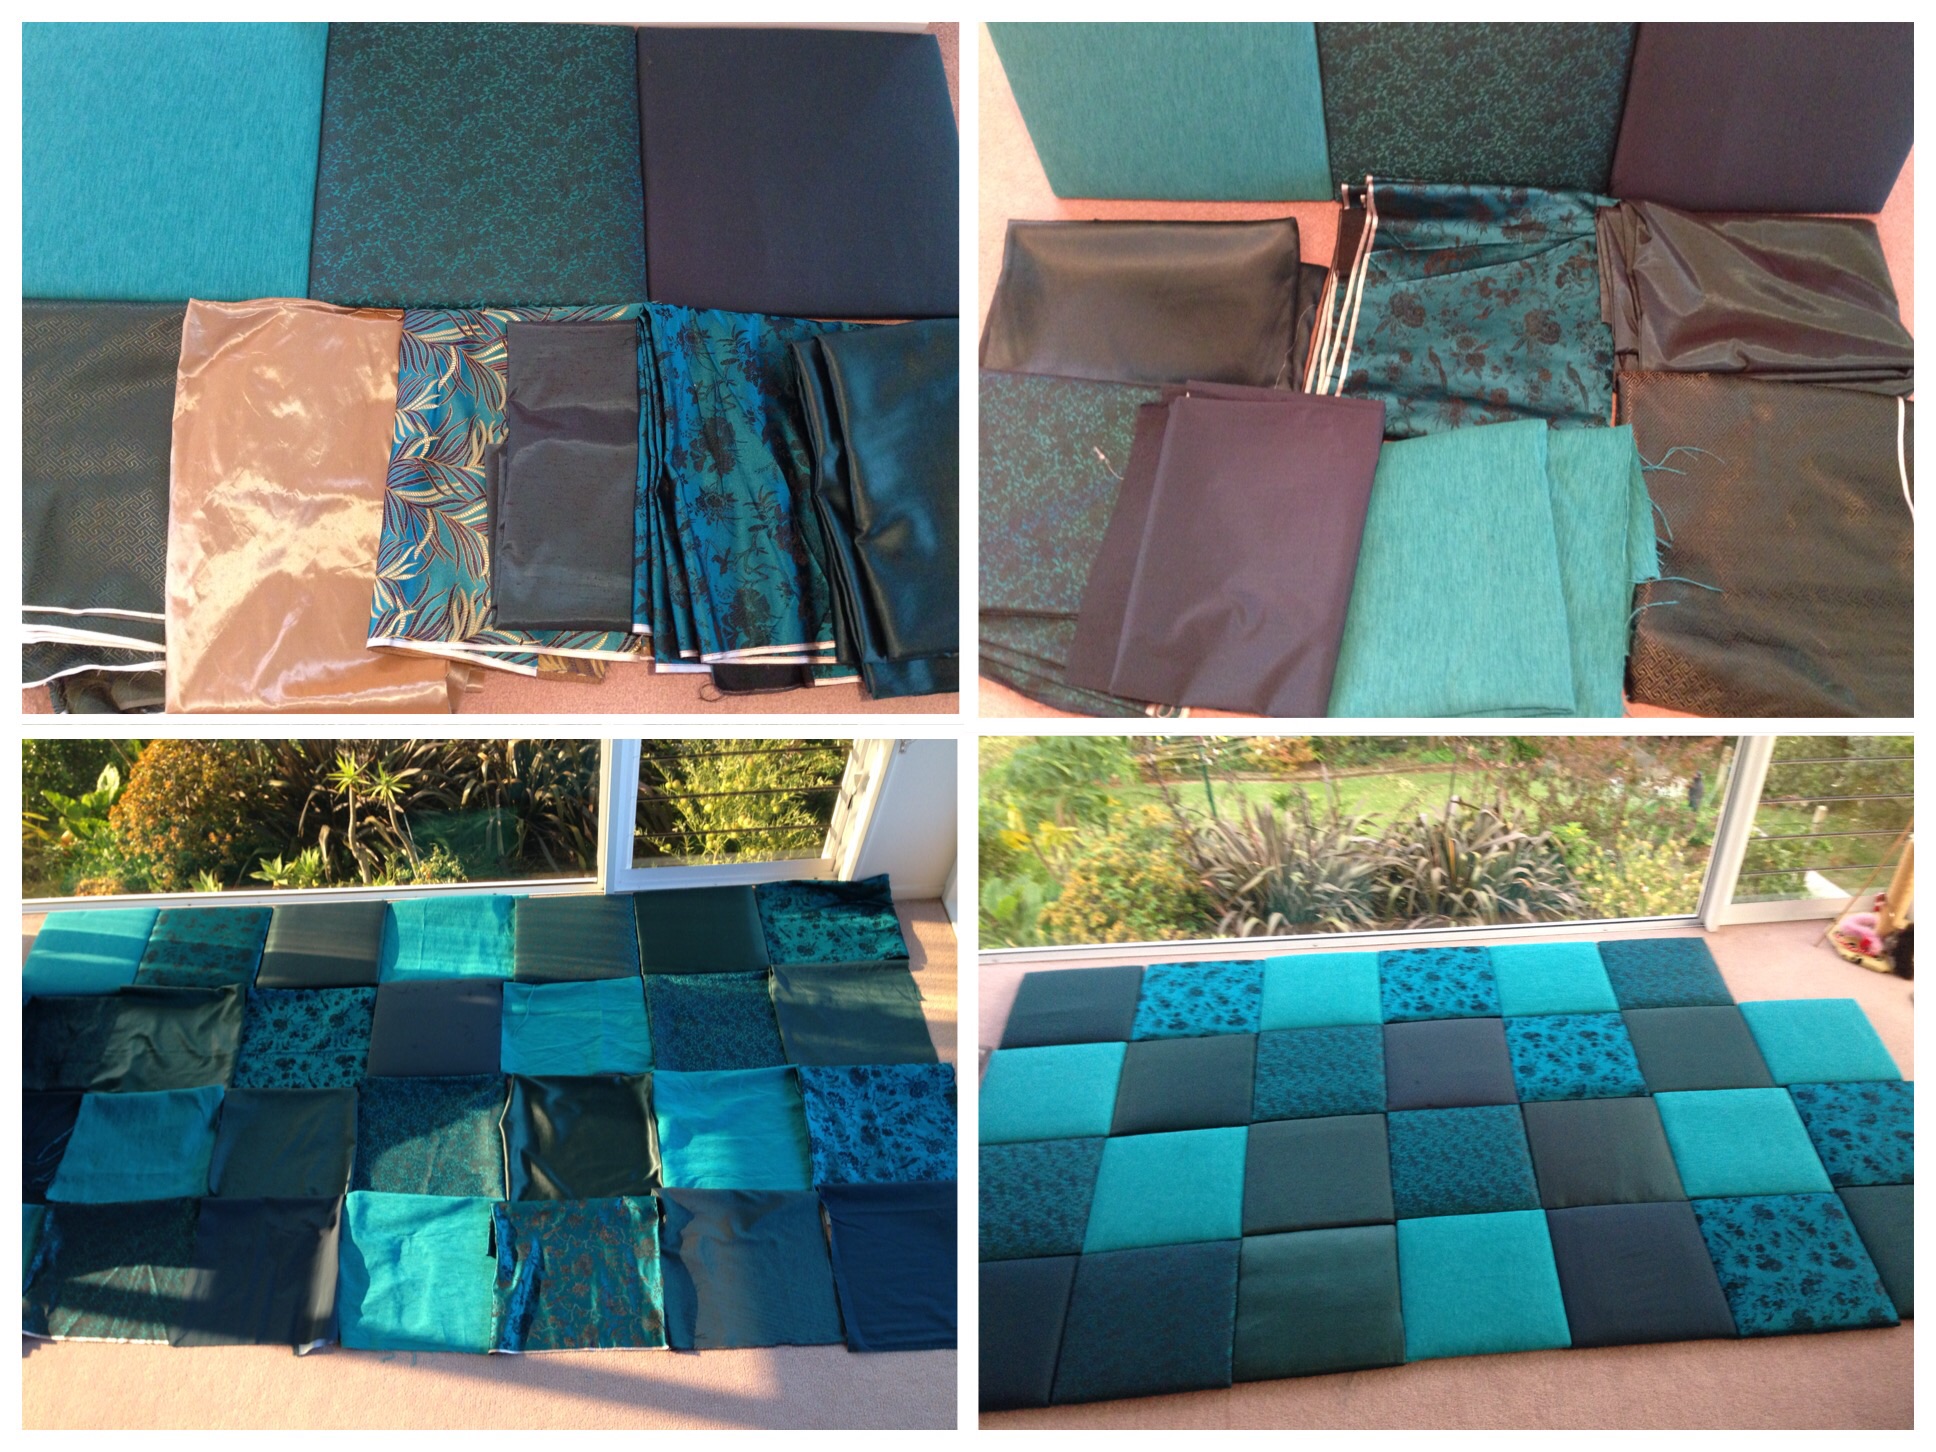
When we were in Shanghai last year I bought some brocades and then found companion fabrics from a variety of fabric shops here in Auckland.
The process was relatively simple, I just spent a lot of time procrastinating.
- The builder cut me squares of plywood to 400 X 400mm
- I stapled on polyester wadding followed by the fabric. If I was doing it again I would consider spending a bit more and buying an electric staple gun, as stapling on wadding and then fabric to the 28 squares gave me a blister and the start of OOS/RSI
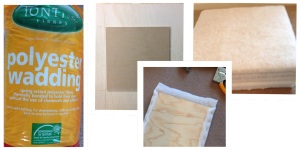
What’s underneath - The upholstering meant that any attempt at direct fixing the panels to the wall wouldn’t work so decided that I would glue a smaller piece of MDF to the back of each square to create a surface to stick to the wall
- Using traditional fixing like picture hooks or screws would require too much precision and would not make it easy to make minor adjustments, so I investigated industrial Velcro but it was hard to get the pieces of Velcro to “click” together. Finally I went with 3M Command Picture Strips which are a version of Velcro. I overspec-ed them using enough to support around 5 kilos when each panel only weighs around 3 kilos, but important that they stick to the wall, rather than fall on our heads in the middle of the night.
- I also put one panel up on the wall for a week in a spot where it wouldn’t drop on our heads if the glue failed. Happily I’d passed the test.
- The command strips took some time to affix, as you had to put them in place, then remove each panel and go through a process of putting 30 seconds of pressure on each of the 168 strips on the wall and the panels to make sure they adhere to the wall in the long term. Not a particularly cheap solution but very flexible with the ability to make minor adjustments without having to reposition the fixings.
- I had bought several patterns and options for the project, but quickly decided that only a couple of patterns with the plain/textures had more impact. Working out a relatively random pattern also took some time, juggling panels on the floor to make sure I liked the look.

Refining and simplifying fabric selection then deciding on the pattern

At last I’ve finished, it’s up and looks amazing.

